Introduction #
Integrating Notification Master plugin with Facebook allows you to automate the posting of updates to your Facebook pages directly from your WordPress site. This guide will walk you through the steps to create a Facebook Developer account, generate an access token, and configure the Facebook integration within Notification Master plugin.
How to Set Up and Use the Notification Master Plugin by WP Learning Lab #
Benefits Of Integrating With Facebook #
Integrating Notification Master plugin with Facebook provides several benefits:
- Automation: Automatically post updates to your Facebook pages based on specific triggers from your WordPress site.
- Engagement: Keep your audience engaged by consistently updating your Facebook pages with relevant content.
- Efficiency: Streamline your social media management by handling posts directly from your WordPress dashboard.
Steps To Create A Facebook Developer Account And Generate An Access Token #
Create a Facebook Developer Account: #
- Go to the Facebook for Developers website and log in with your Facebook account.
- Click on Get Started and follow the prompts to create your developer account.
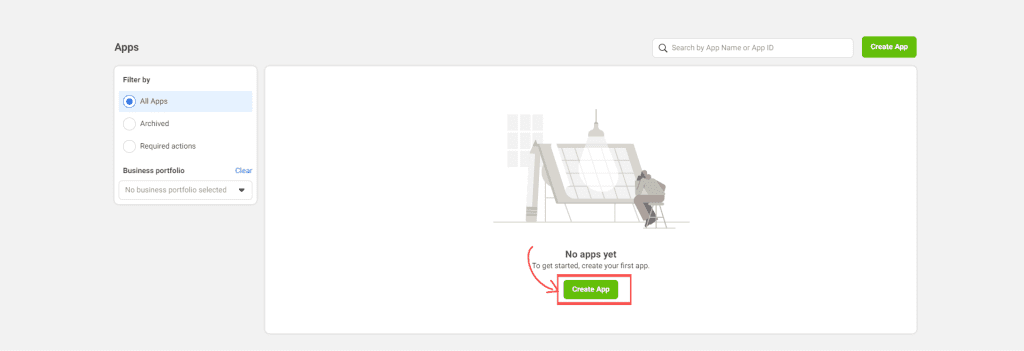
Create a New App: #
- In the Facebook Developer Dashboard, click on Create App.
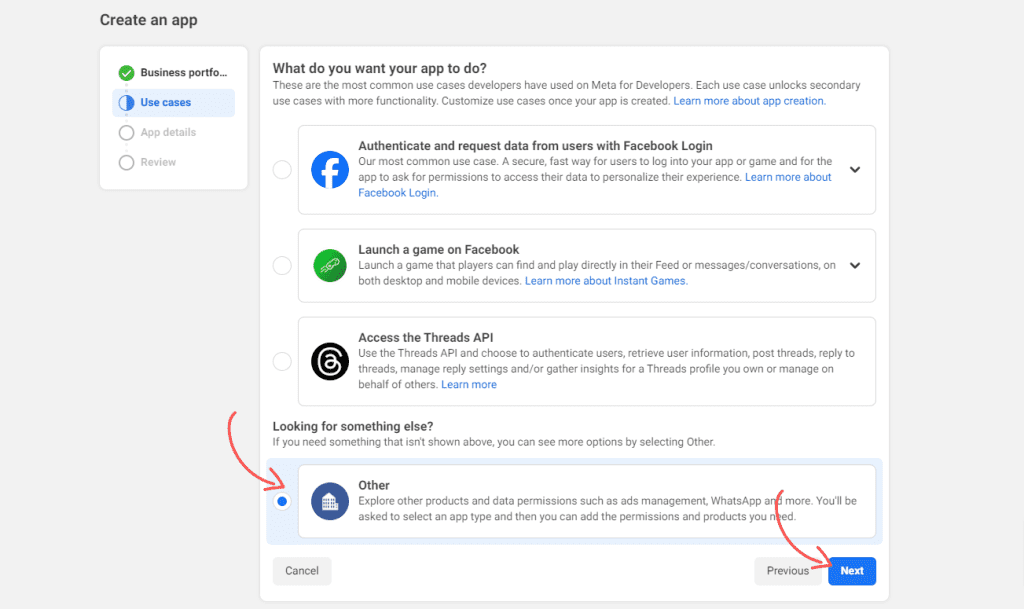
Select App Purpose: #
- On the “Create an App” page, select Other under “What do you want your app to do?” and click Next.
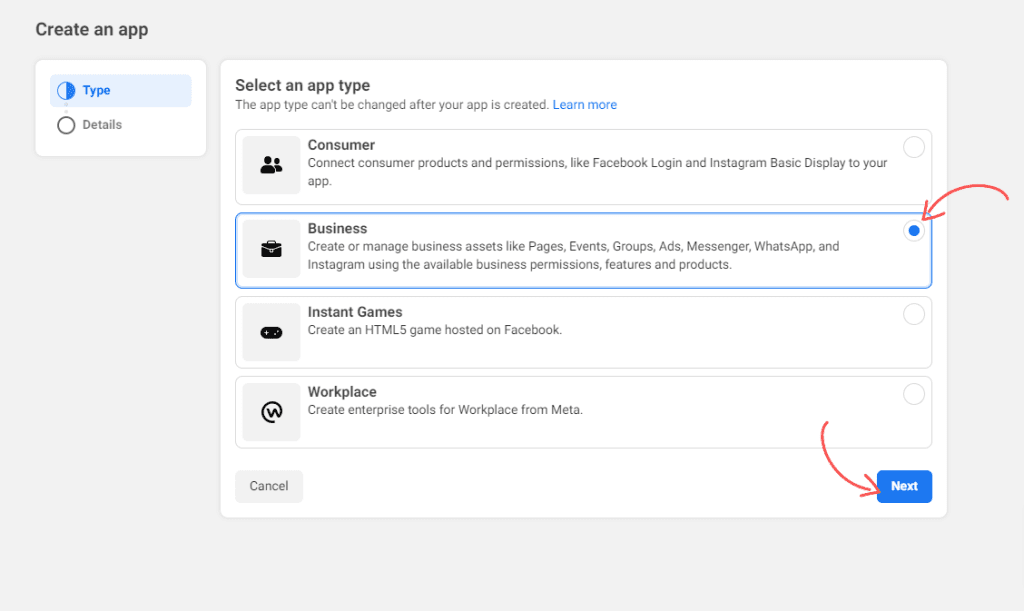
Select App Type: #
- Choose Business as the app type and click Next.
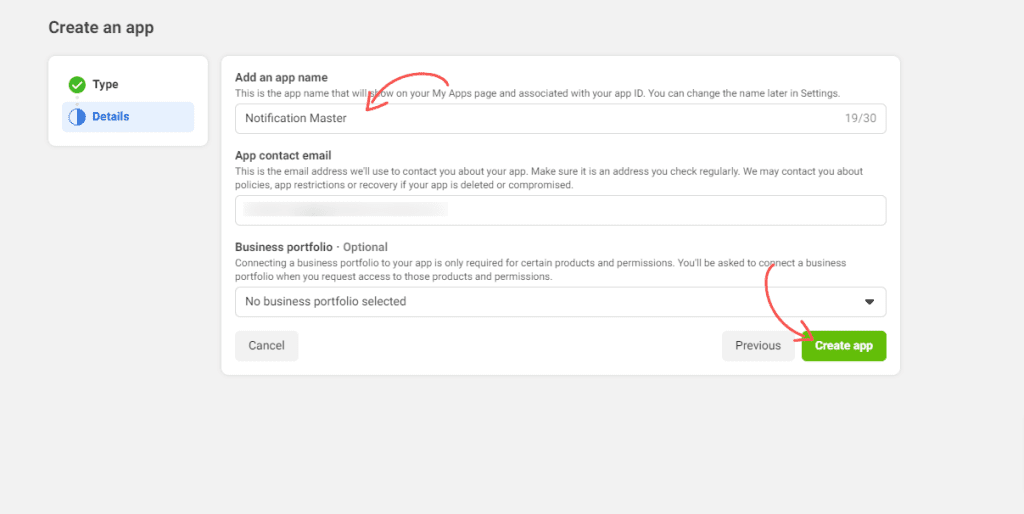
App Details: #
- Enter the app name and contact email, then click Create App.
App ID and App Secret: #
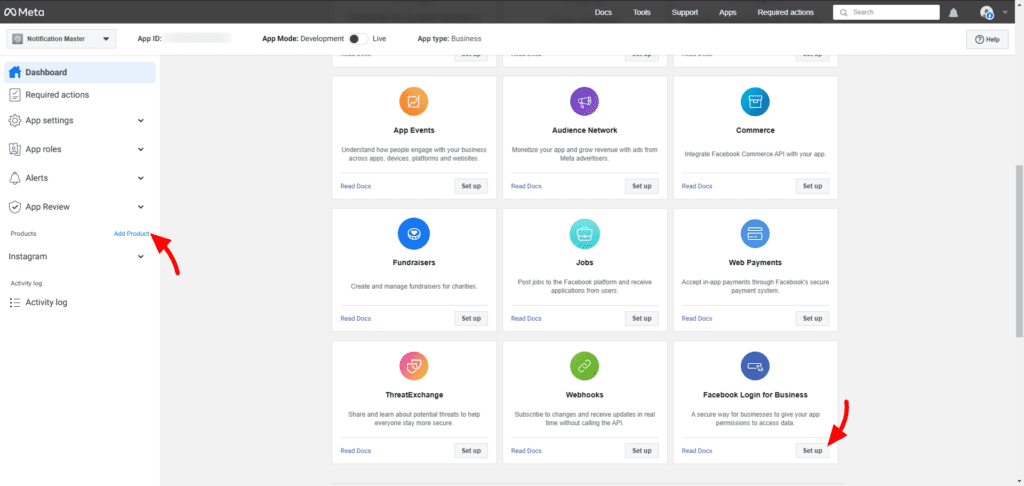
- Go to Products > Add Product, scroll down, and click set up on Facebook Login for Business.
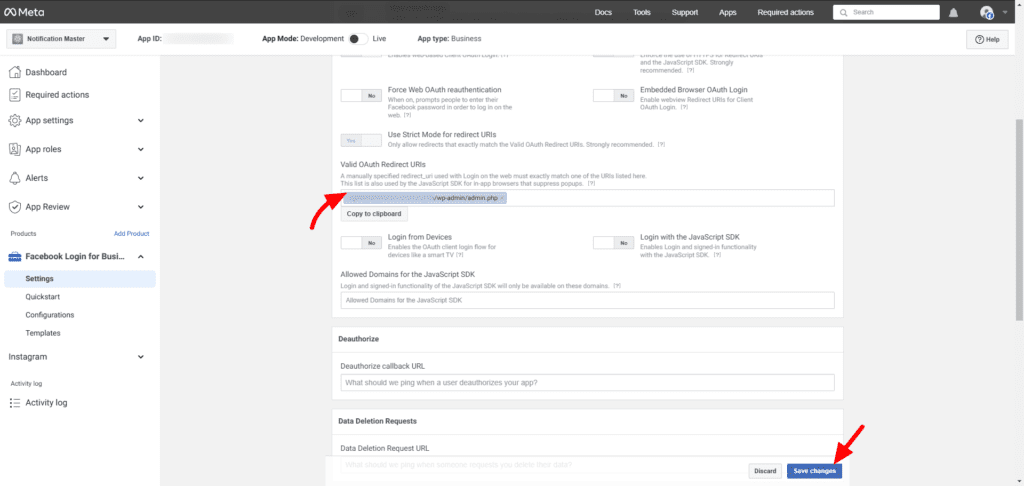
- Copy your redirect URL from your connection page and past it into the Valid OAuth Redirect URIs then click Save Changes.

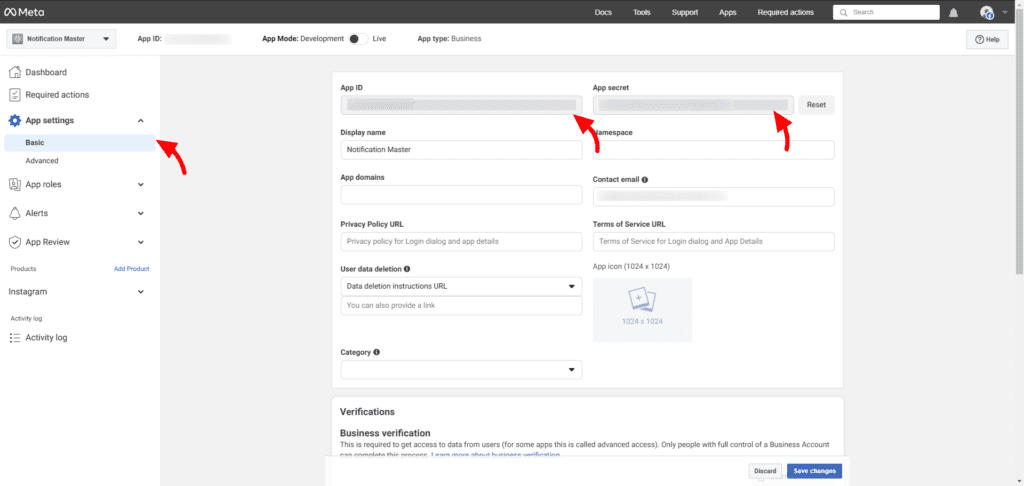
3. Navigate to Settings > Basic and note down your App ID and App Secret.
Steps To Add A Facebook Integration In Notification Master Plugin #
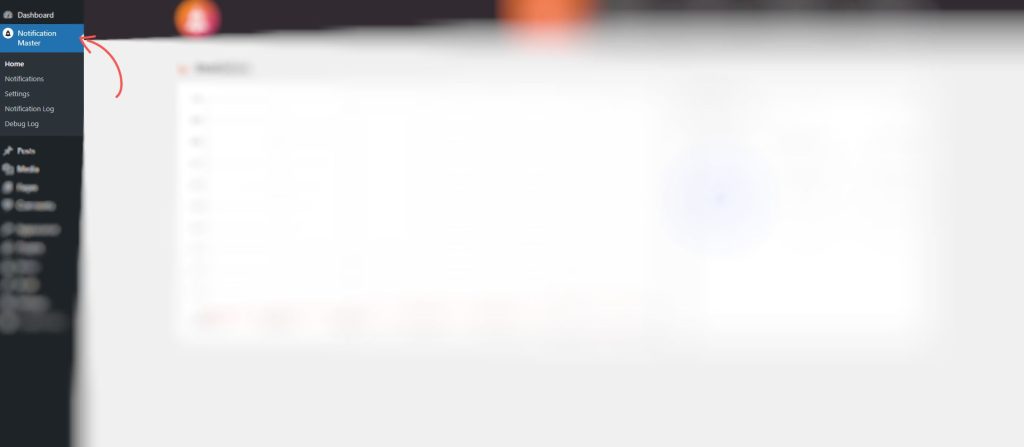
1. Navigate to Notification Master #
Accessing Notification Master:
- From the main menu on the left, scroll down and click on Notification Master.
- This will open the main interface of the Notification Master plugin, where you can manage all your WordPress notifications.
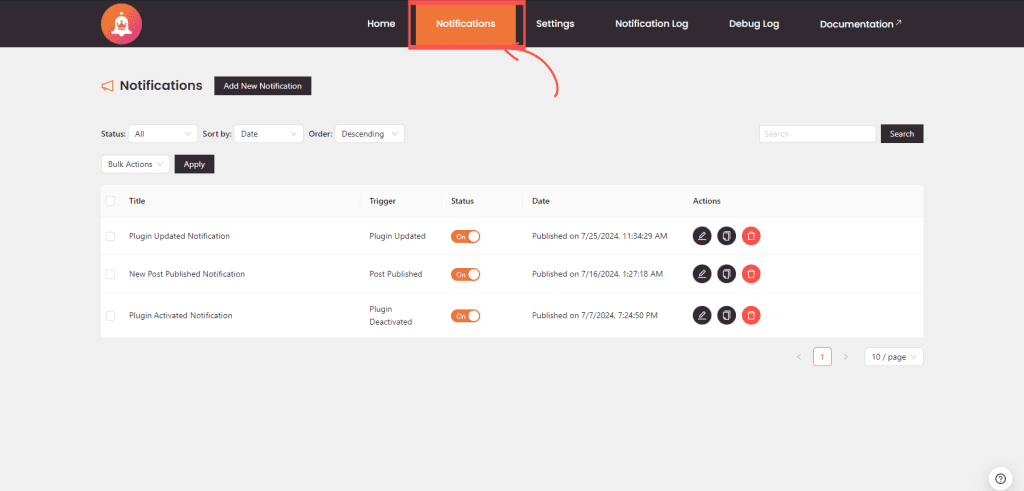
2. Access Notifications #
Opening the Notifications Tab:
- Locate the Notifications tab within the Notification Master interface.
- Click on the Notifications tab to view a list of all existing notifications. Here, you can manage, edit, or delete existing notifications.
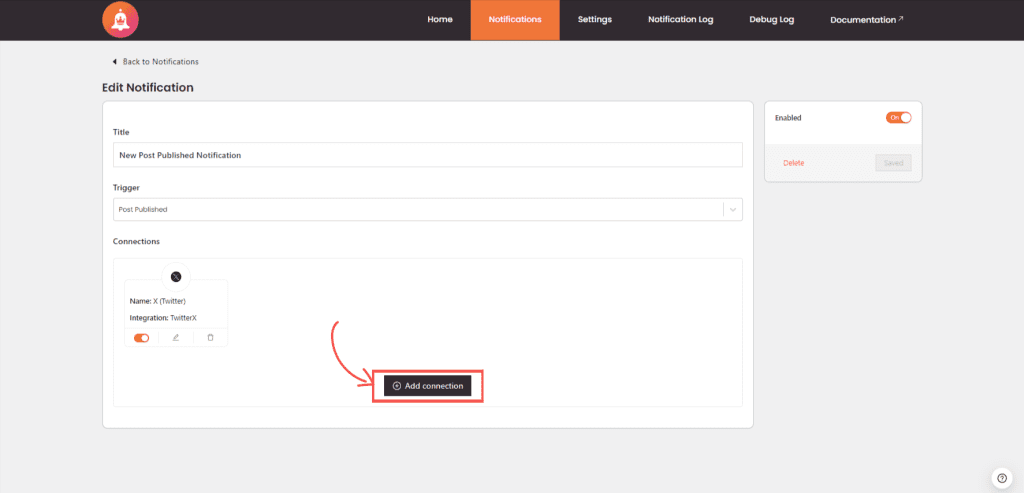
3. Add a Facebook Integration #
You can add a Facebook integration to an existing notification or while creating a new notification.
To Add an Integration:
- In the notification configuration settings, scroll down to the Connections section.
- Click on Add Connection to create a new connection for this notification.
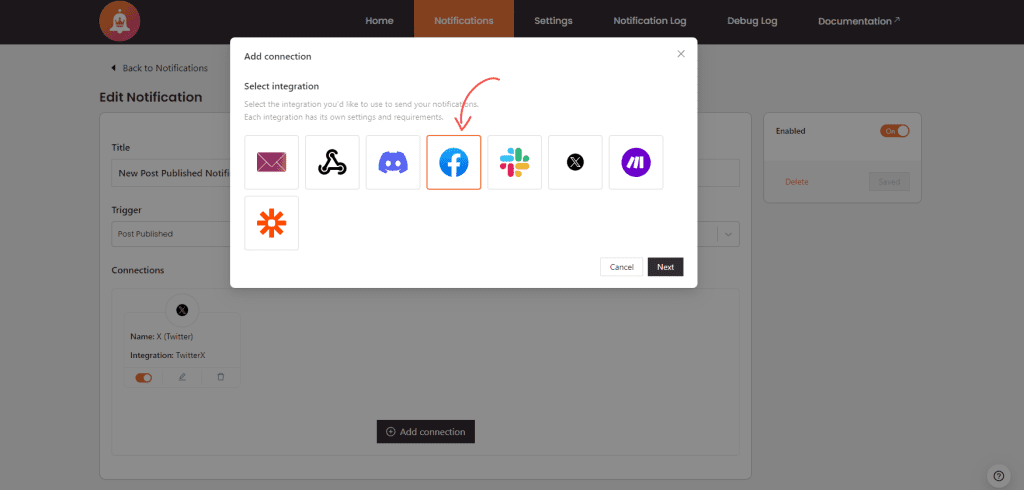
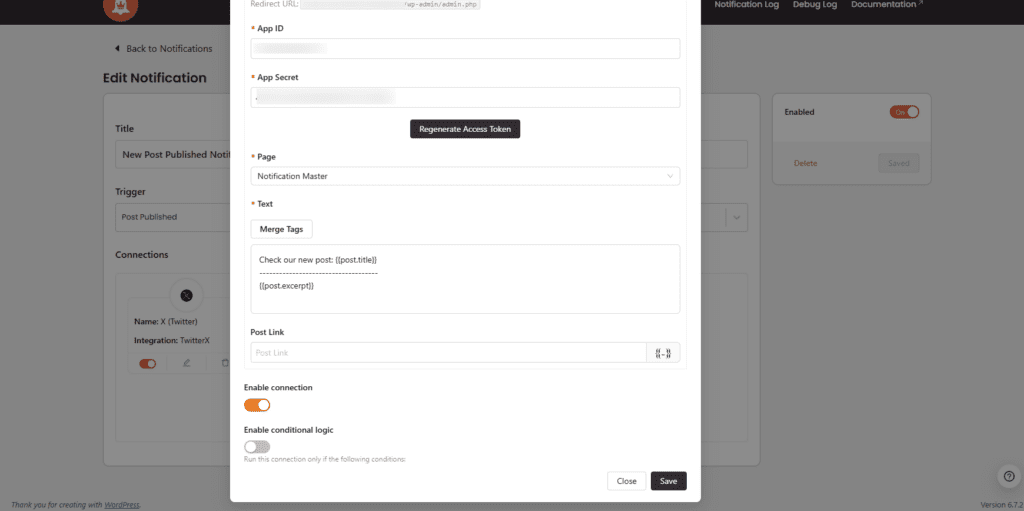
4. Configure the Facebook Integration #
Setting Up Facebook Integration:
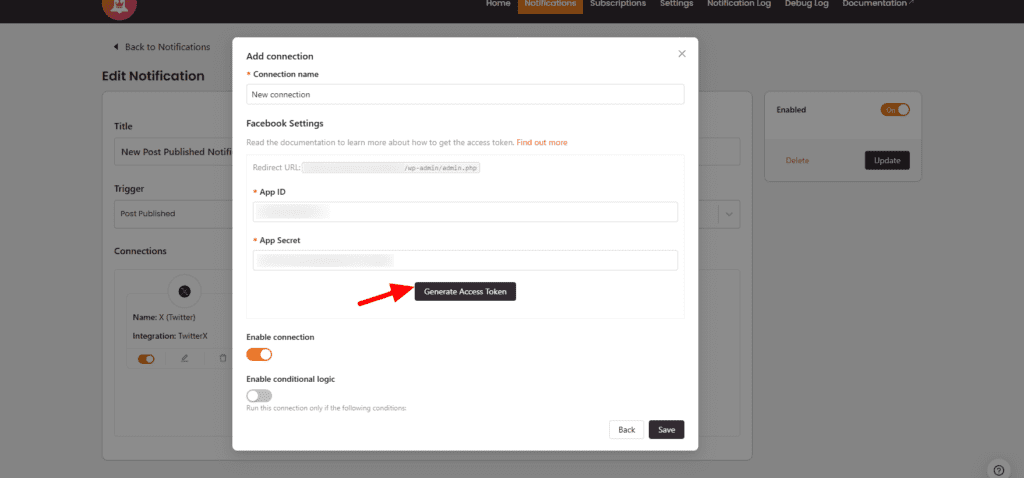
- Connection Name: Enter a name for your integration to easily identify it later. This field is required.
- App ID: Enter your Facebook App ID. This field is required.
- App Secret: Enter your Facebook App Secret. This field is required.
- Generate Access Token:
- Click Generate Access Token.
- A popup window will appear, prompting you to log in to your Facebook account and grant permissions.
- In the popup, allow the app to access the pages you manage.
- Notification Master will handle the authentication process and retrieve a long-lived access token for you.
- Page: Select the Facebook page you want to post updates to from the dropdown list. This field is required.
- Text: Enter the text of your post. You can use merge tags to dynamically insert content from your WordPress site.
- Post Link: If applicable, enter a link to include in the post.
- Enable Integration: Ensure this switch is toggled on to activate the Facebook integration.
- Save the Integration: After configuring the Facebook settings, click Save to save the integration. This will close the connection modal and apply the settings to your notification.
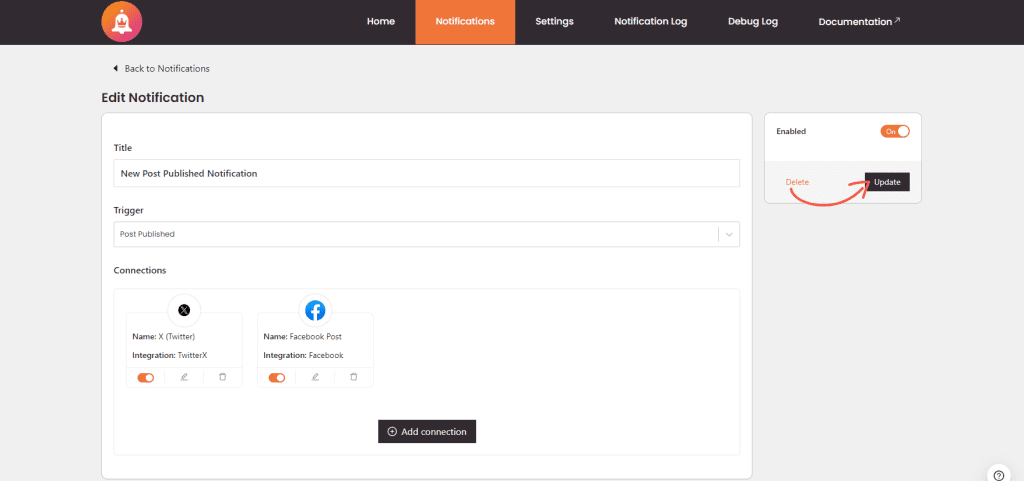
5. Finalize And Save The Notification #
Updating the Notification:
- Ensure that all necessary integrations, including the newly added Facebook integration, are properly configured.
- To ensure your notification is active, toggle the activation switch if it isn’t already on.
- Finally, click Save to update and save your notification configuration. Your notification is now ready to post updates to your selected Facebook page based on the specified triggers.
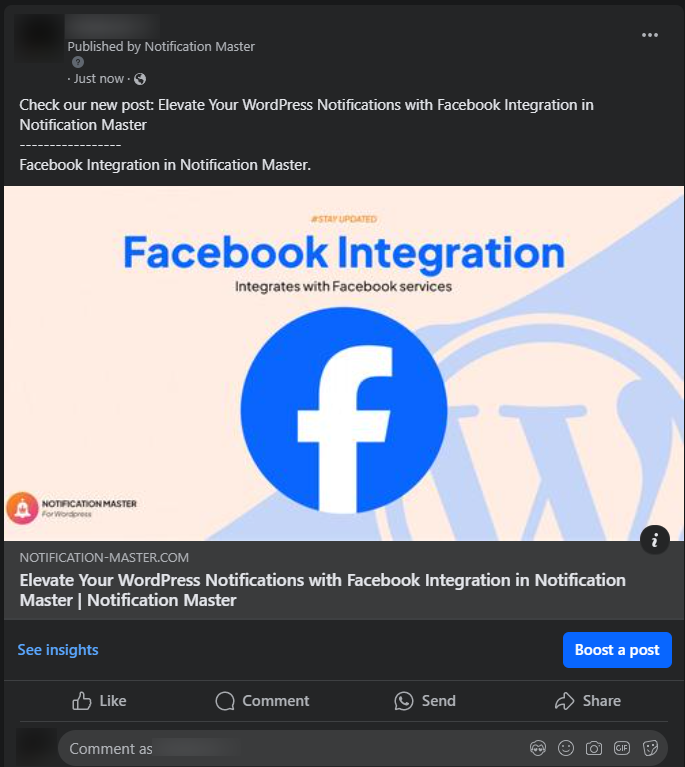
Notification Outcome upon Post Publication #
Conclusion #
By following these steps, you can effectively add and configure a Facebook integration to an existing notification or create a new notification in Notification Master plugin. This feature enhances the flexibility of your WordPress notification system, allowing you to integrate with Facebook and automate posts to your pages. For more detailed guides on using Notification Master plugin, refer to our comprehensive documentation or contact our support team.


