Introduction #
Integrating the Notification Master plugin with Instagram allows you to automate the posting of updates to your Instagram accounts directly from your WordPress site. This guide will walk you through the steps to create an Instagram Developer account, generate an access token, and configure the Instagram integration within the Notification Master plugin.
How to Set Up and Use the Notification Master Plugin by WP Learning Lab #
Benefits Of Integrating With Instagram #
Integrating Notification Master with Instagram provides several benefits:
- Automation: Automatically post updates to your Instagram accounts based on specific triggers from your WordPress site.
- Engagement: Keep your followers engaged by consistently posting relevant content to your Instagram feed.
- Efficiency: Streamline your social media management by handling posts directly from your WordPress dashboard.
Steps To Create A Facebook Developer Account And Generate An Access Token #
Create a Facebook Developer Account: #
- Go to the Facebook for Developers website and log in with your Facebook account.
- Click on Get Started and follow the prompts to create your developer account.
Create a New App: #
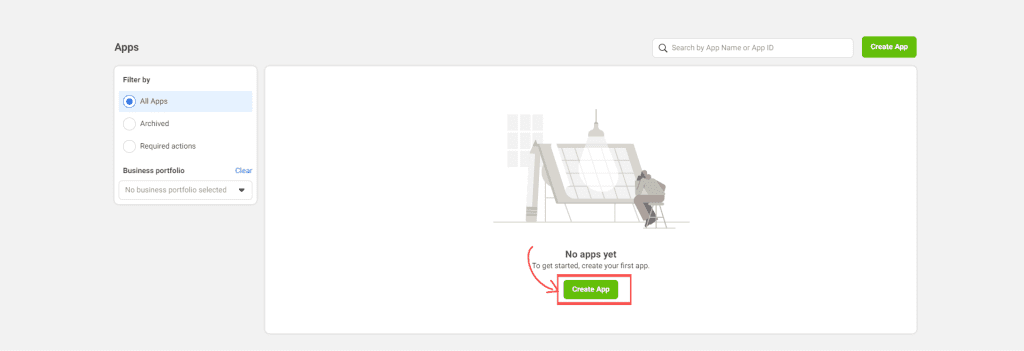
- In the Facebook Developer Dashboard, click on Create App.
Select App Purpose: #
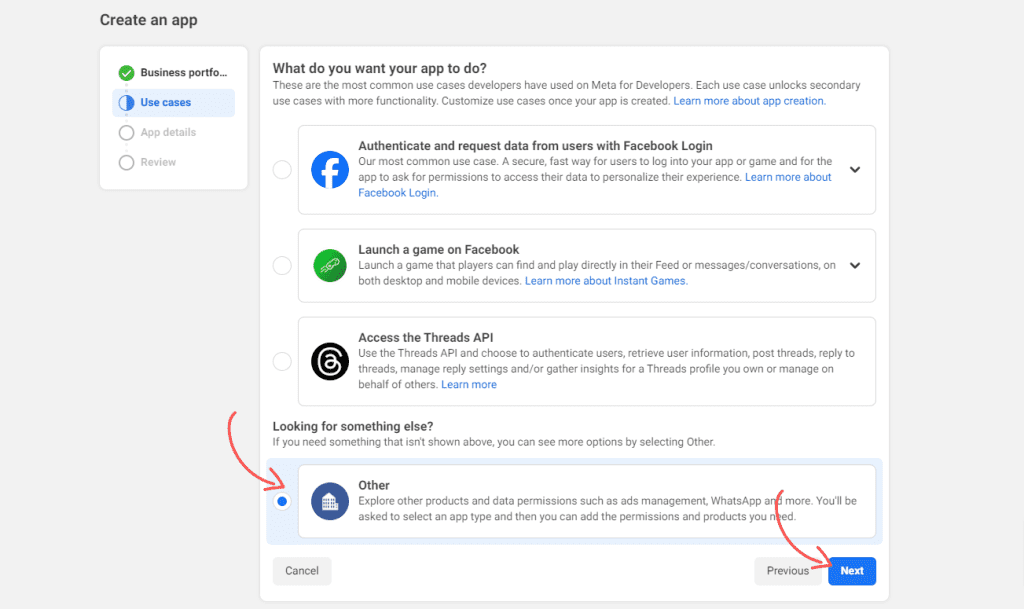
- On the “Create an App” page, select Other under “What do you want your app to do?” and click Next.
Select App Type: #
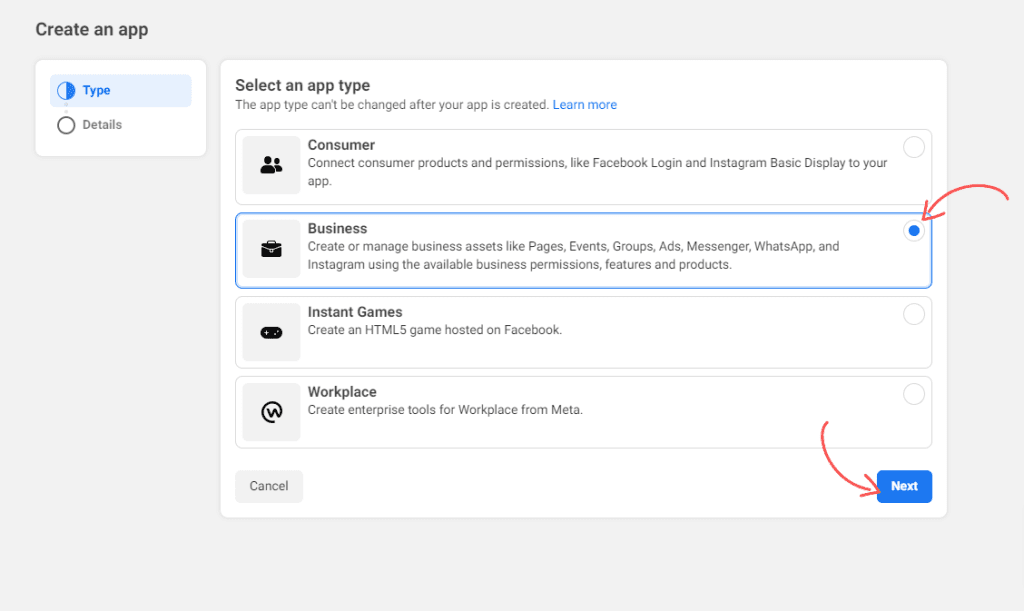
- Choose Business as the app type and click Next.
App Details: #
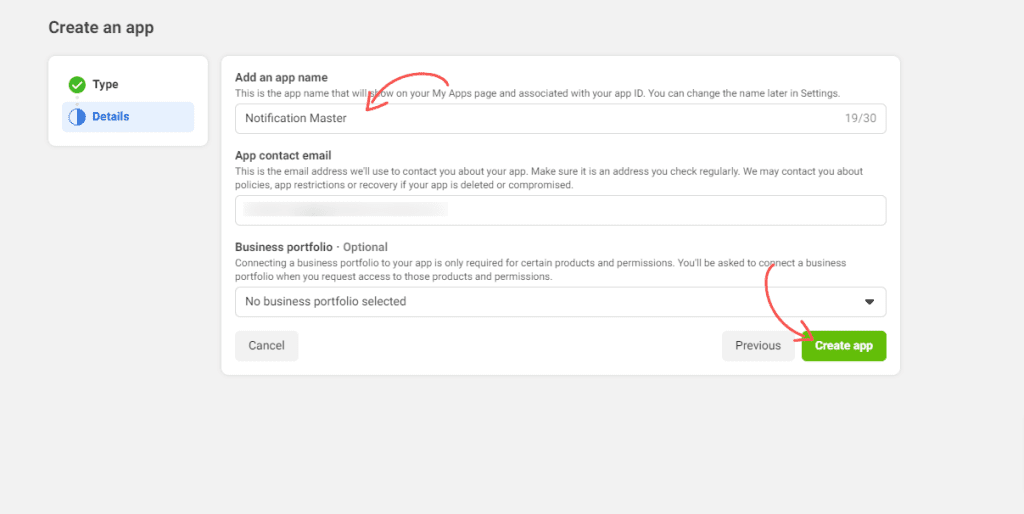
- Enter the app name and contact email, then click Create App.
App ID and App Secret: #
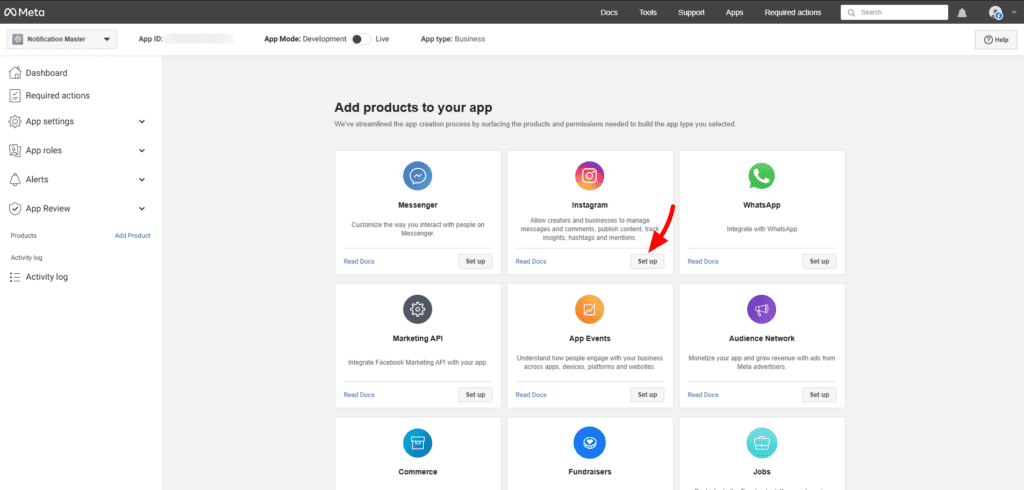
- Go to Products > Add Product.
- Scroll down and click Set up on Instagram.
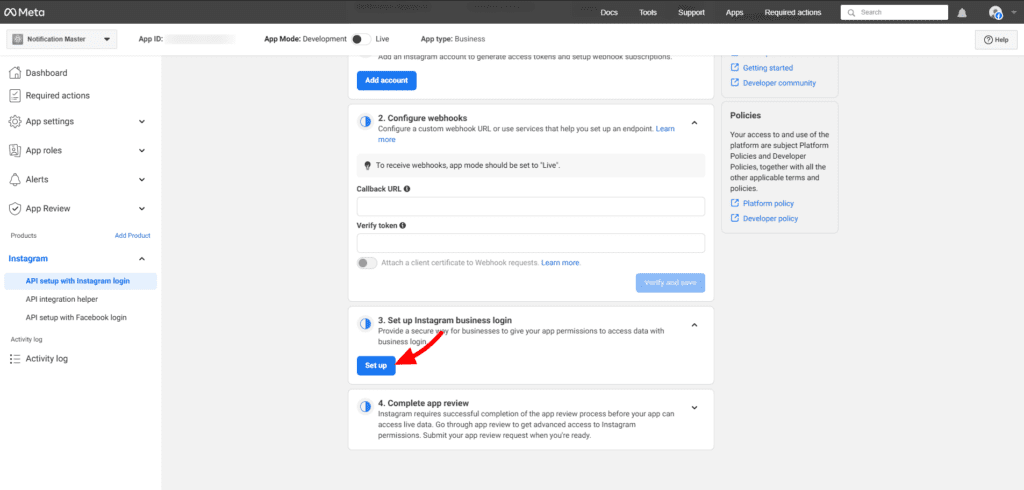
- In the API Setup with Instagram Business Login, scroll to Set up Instagram Business Login section and click Set up.
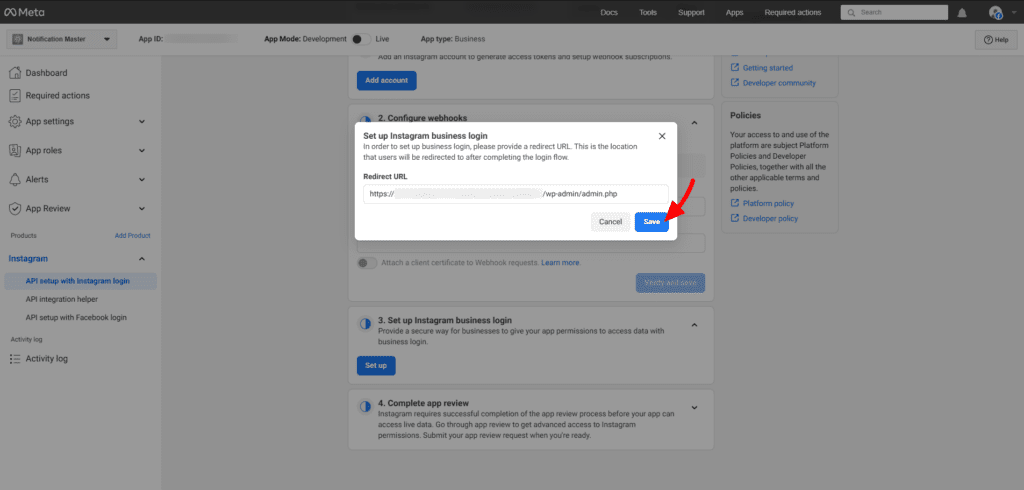
- Paste the Redirect URL from the Notification Master connection page and click Save.
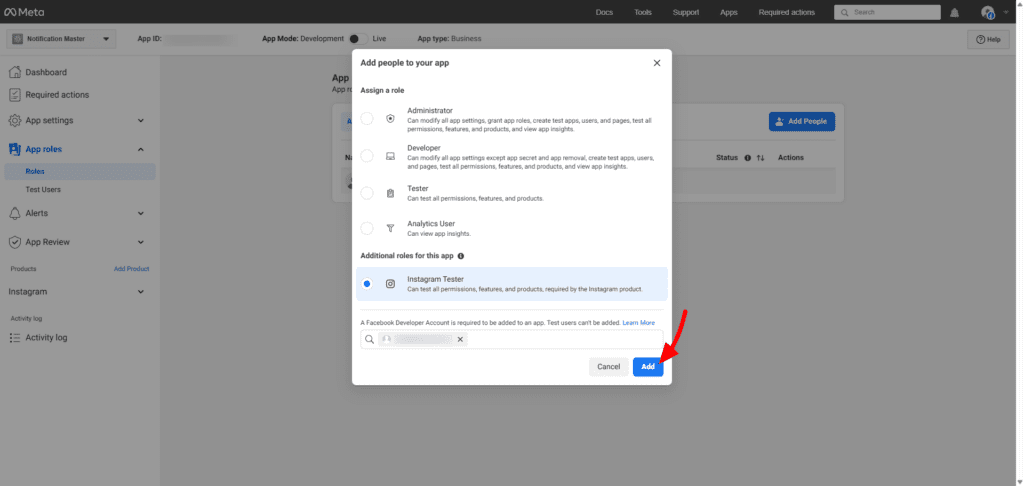
Add Instagram Tester Role: #
- Navigate to App Roles and click on Add People.
- Select Instagram Tester and add your Instagram account, then click Add.
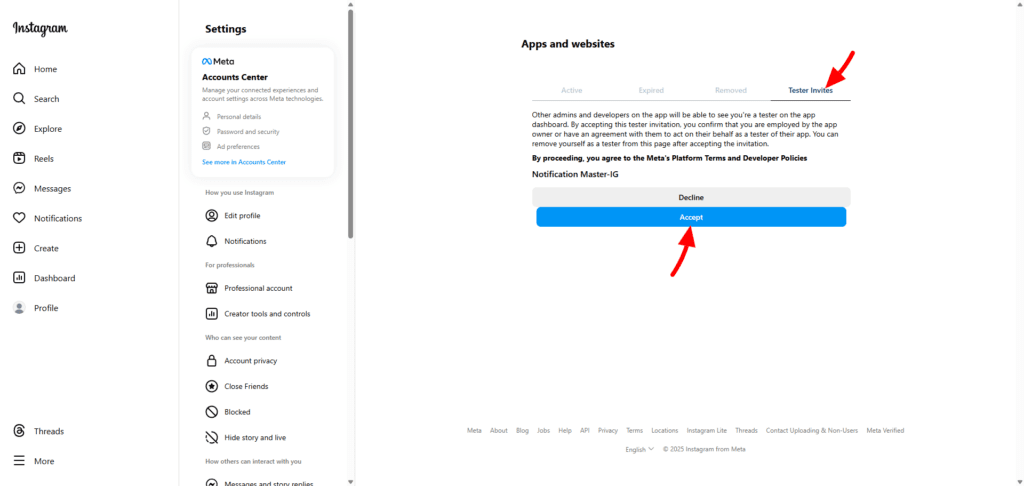
Accept Tester Invitation: #
- Go to Instagram Accounts Manage Access.
- Navigate to the Tester Invites tab and accept the invitation.
Copy Instagram App Name and App Secret: #
- Go back to the API Setup with Instagram Business Login section.
- Copy your Instagram App Name and Instagram App Secret.

Steps To Add A Instagram Integration In Notification Master Plugin #
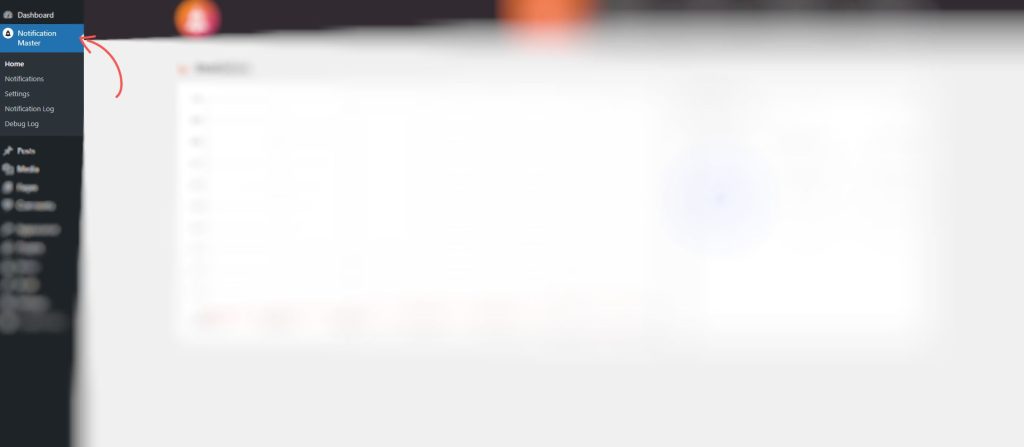
1. Navigate to Notification Master #
Accessing Notification Master:
- From the main menu on the left, scroll down and click on Notification Master.
- This will open the main interface of the Notification Master plugin, where you can manage all your WordPress notifications.
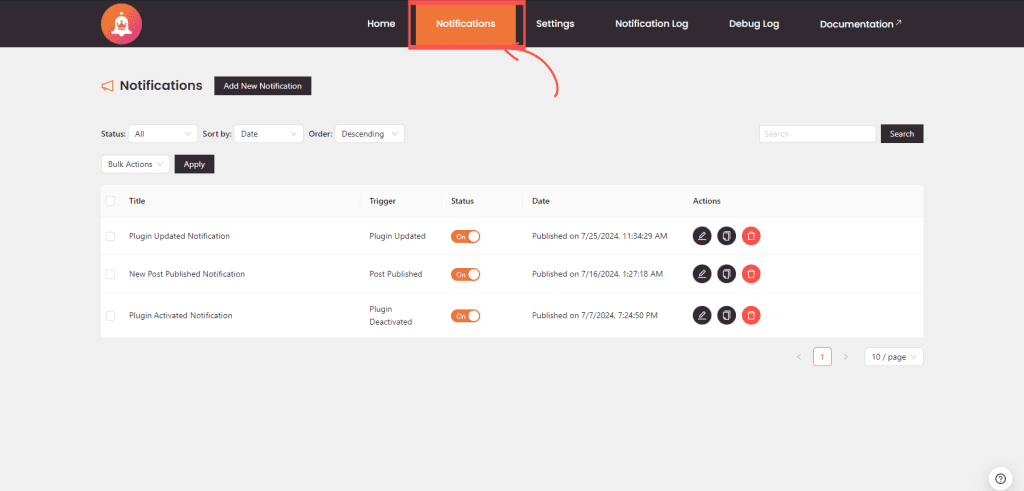
2. Access Notifications #
Opening the Notifications Tab:
- Locate the Notifications tab within the Notification Master interface.
- Click on the Notifications tab to view a list of all existing notifications. Here, you can manage, edit, or delete existing notifications.
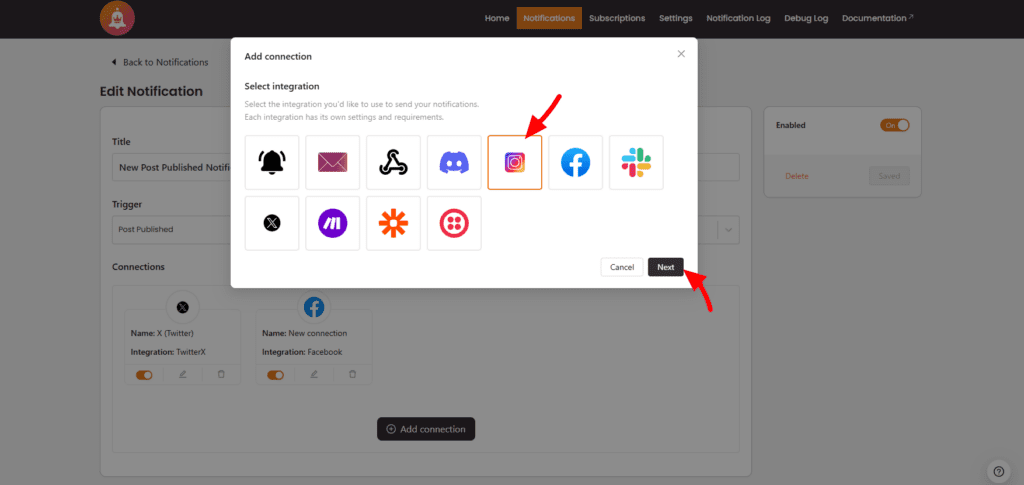
3. Add a Instagram Integration #
You can add a Instagram integration to an existing notification or while creating a new notification.
To Add an Integration:
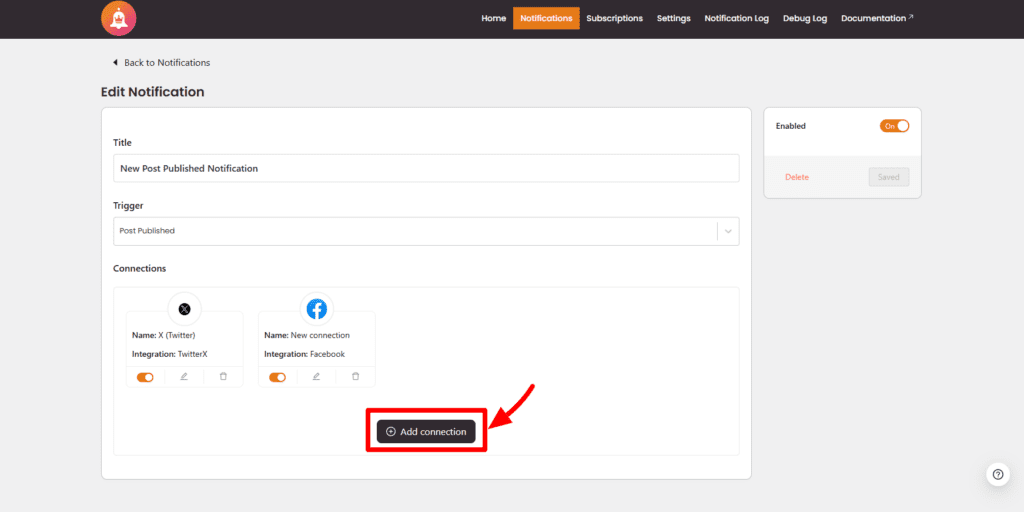
- In the notification configuration settings, scroll down to the Connections section.
- Click on Add Connection to create a new connection for this notification.
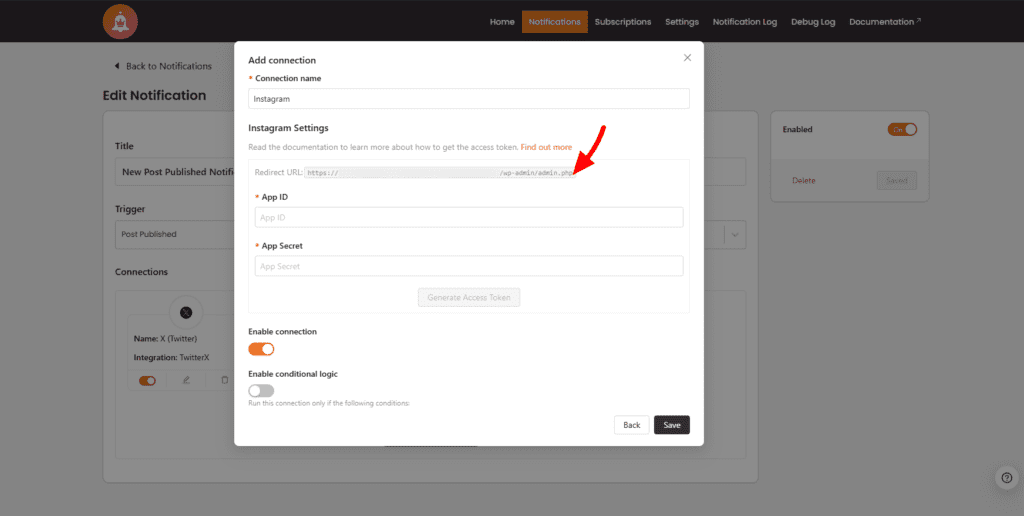
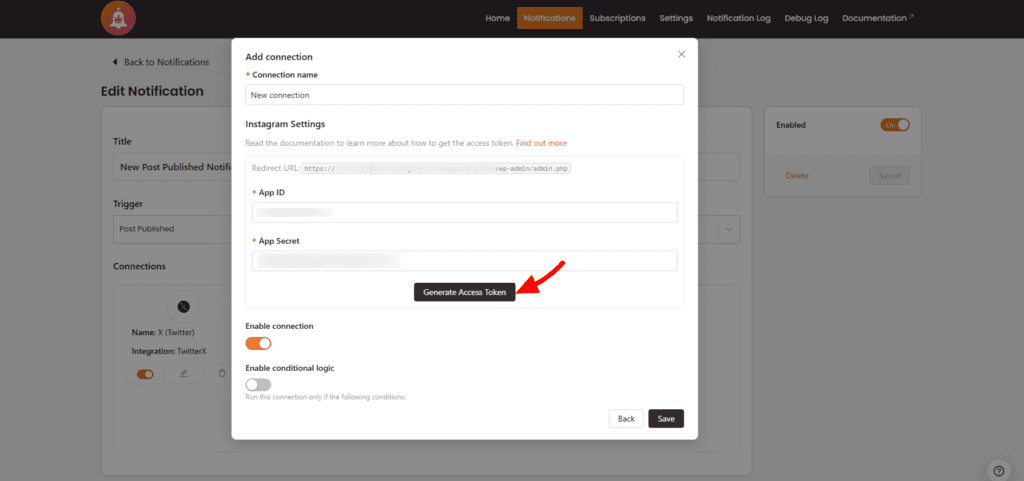
4. Configure the Instagram Integration #
- Paste the Instagram App Name into the App ID field in the Notification Master connection setup.
- Paste the Instagram App Secret into the App Secret field.
- Click Generate Access Token.
- A popup window will appear, prompting you to log in to your Instagram account and grant permissions.
- Notification Master will handle the authentication process and retrieve a long-lived access token for you.
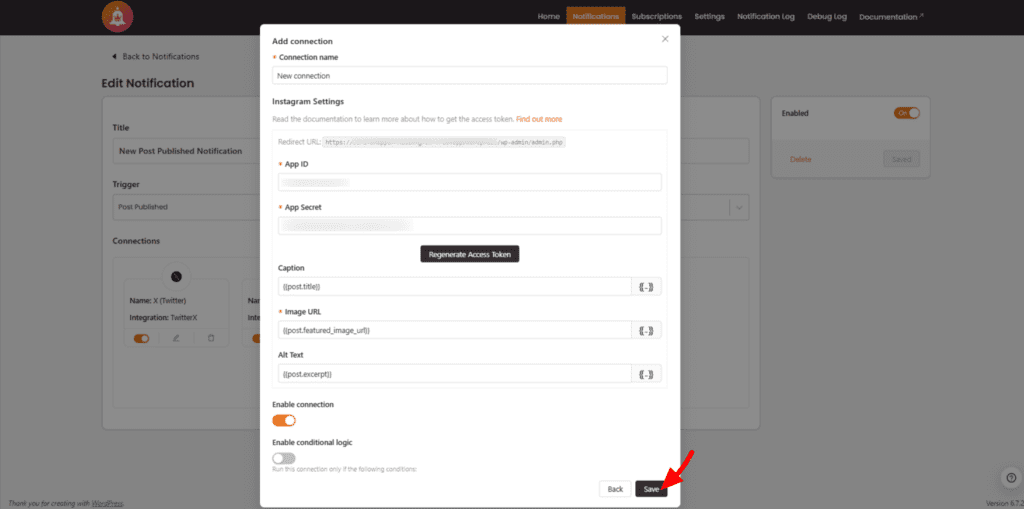
- Caption: The text you want to post on Instagram.
- Image URL: The URL of the image you want to share.
- Alt Text: The alt text associated with the image.
- Enable Integration: Ensure this switch is toggled on to activate the Instagram integration.
- Save the Integration: After configuring the Instagram settings, click Save to save the integration. This will close the connection modal and apply the settings to your notification.
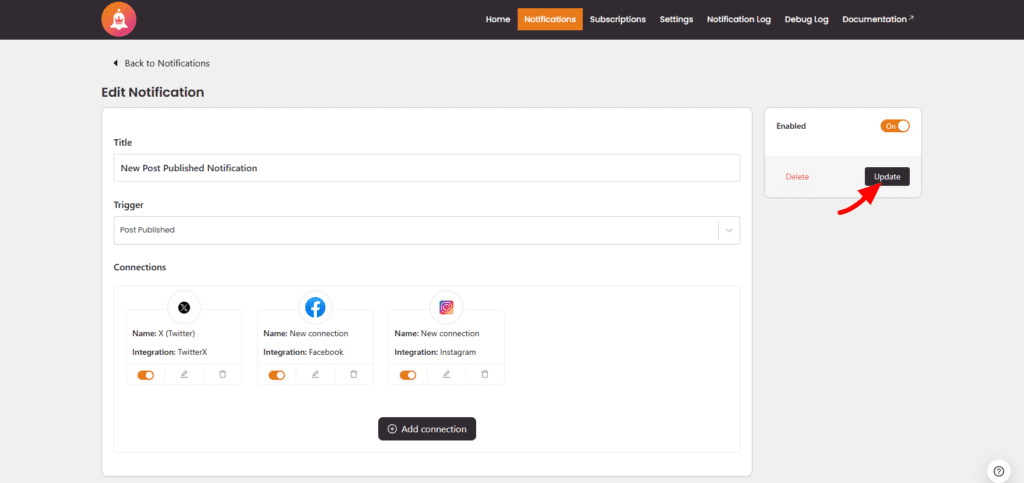
5. Finalize And Save The Notification #
Updating the Notification:
- Ensure that all necessary integrations, including the newly added Instagram integration, are properly configured.
- To ensure your notification is active, toggle the activation switch if it isn’t already on.
- Finally, click Save to update and save your notification configuration. Your notification is now ready to post updates to your Instagram account page based on the specified triggers.
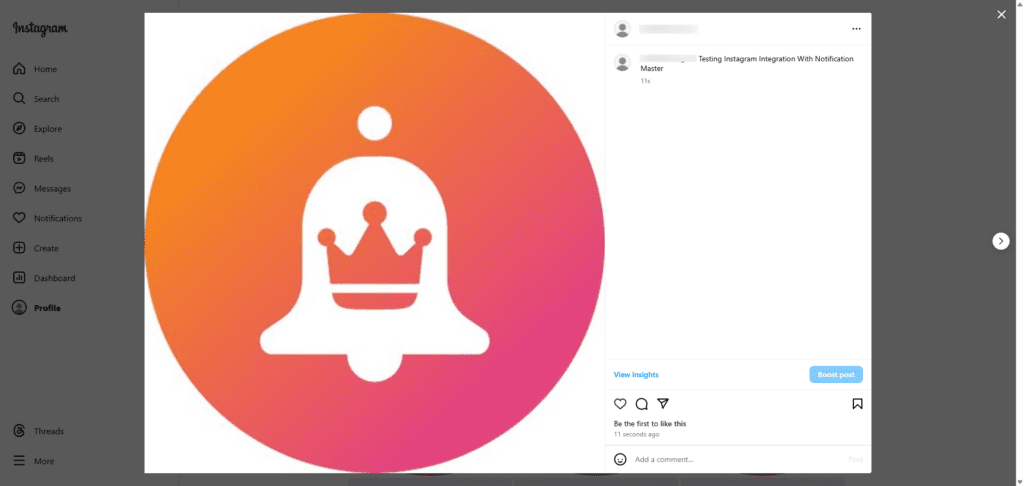
Notification Outcome upon Post Publication #
Conclusion #
Integrating Instagram with the Notification Master plugin offers a seamless way to automate and streamline your social media management directly from your WordPress site. By following the step-by-step guide, you can easily set up Instagram Business Login, configure access tokens, and enable automated posts to your Instagram feed. This integration helps you save time, improve engagement, and maintain a consistent online presence without the need to manually post content.
With the power of automation and the ability to schedule updates, your WordPress site can serve as a hub for efficient content management across multiple platforms, including Instagram. This enhances your workflow, increases productivity, and ensures that your audience remains engaged with fresh, relevant content.
By utilizing the Notification Master plugin’s Instagram integration, you are setting the stage for a more organized and effective social media strategy that drives results for your business.


