Introduction #
Web Push Notifications in the Notification Master plugin allow you to send notifications directly to your users’ browsers. This guide will walk you through the steps to generate or add your Web Push Public and Private Keys and configure a Web Push integration in a notification on your WordPress site.
How to Set Up and Use the Notification Master Plugin by WP Simple Hacks #
Steps to Generate or Add Web Push Keys #
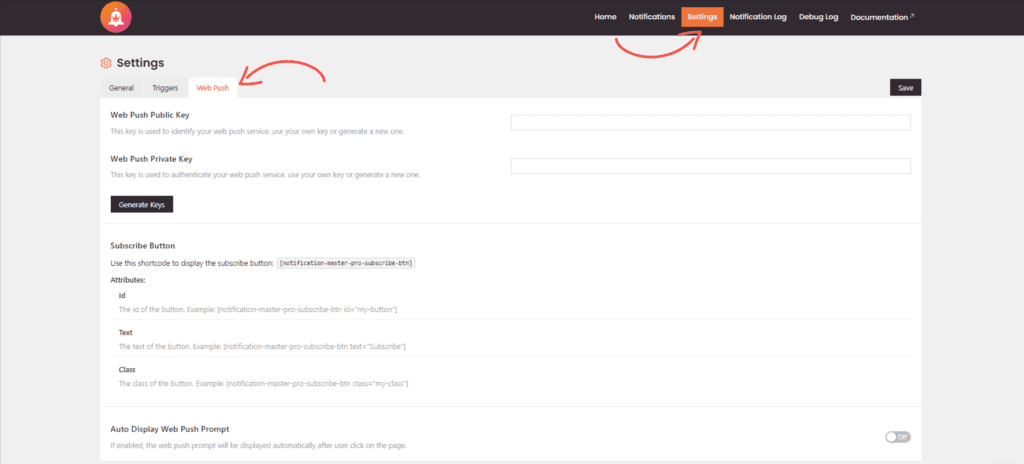
1. Access the Web Push Settings #
Navigating to the Web Push tab:
- Open your WordPress dashboard.
- Go to Notification Master and click on the Settings option.
- Navigate to the Web Push tab.
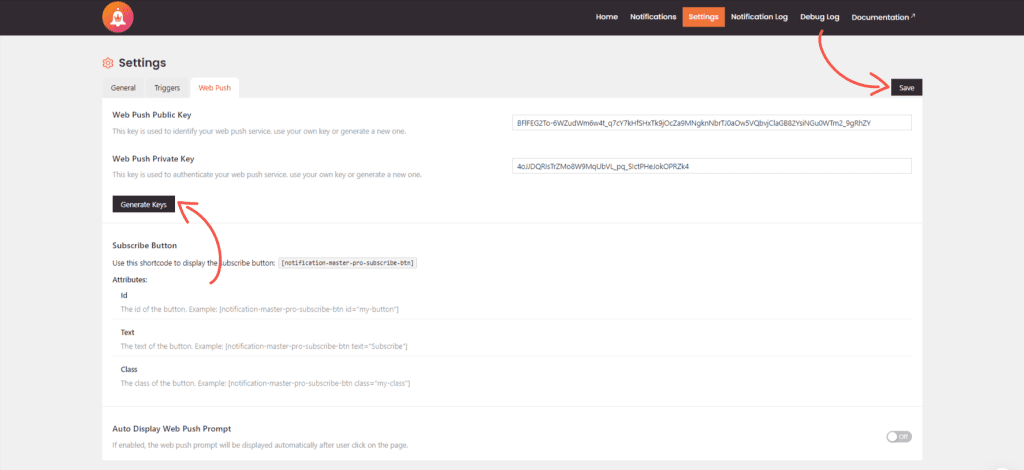
2. Generate or Add Your Keys #
Generating Web Push Public and Private Keys:
- If you don’t have the keys, click on the Generate Keys button to create your Web Push Public and Private Keys.
- If you already have the keys, paste them into the corresponding fields.
- Click Save to store the keys.
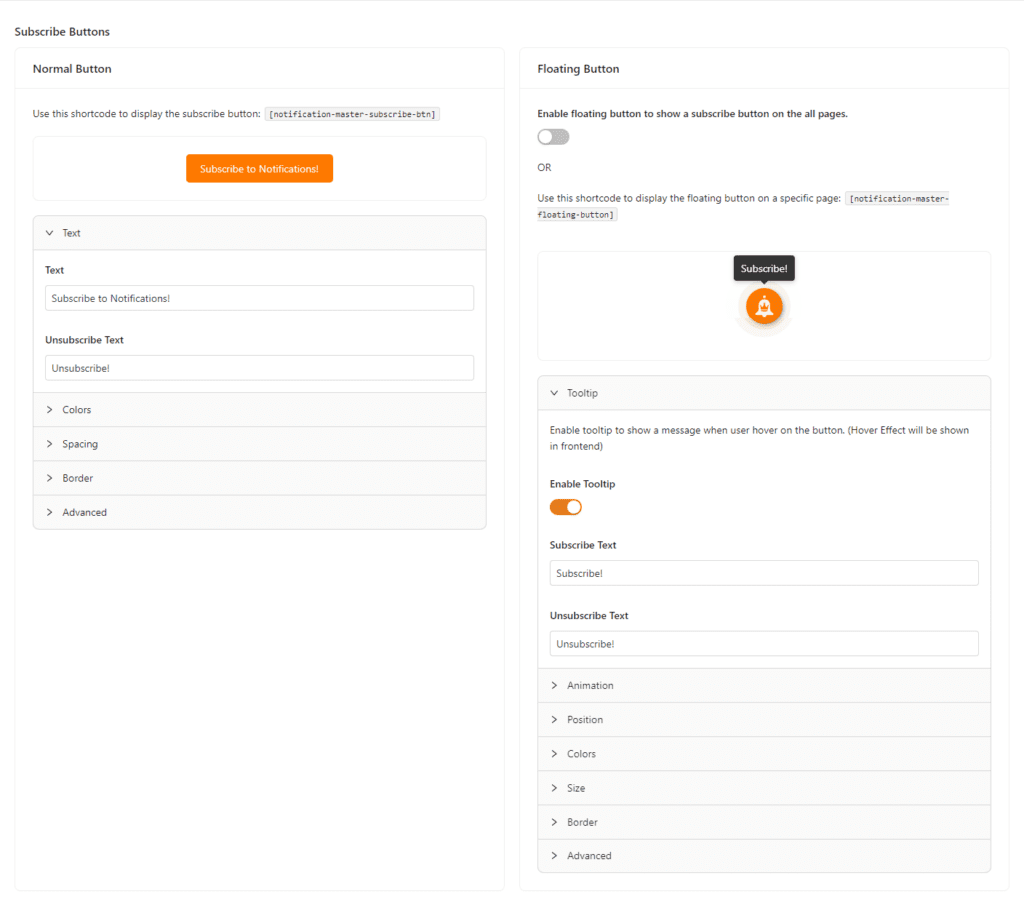
3. Displaying the Web Push Subscribe Button: #
- 1. Normal Button:
- Includes various options for customization, allowing you to adjust aspects like color, spacing, text, and advanced settings for additional styling.
- 2. Floating Button:
- Offers customization options as well, with an added setting to control whether the button is visible on all pages.
4. Enable Auto Display Web Push Prompt #
Automatic Display of the Subscription Prompt:
- Enable the Auto Display Web Push Prompt option to show the subscription prompt to users after their first click on your page.

Steps to Add a Web Push Integration #
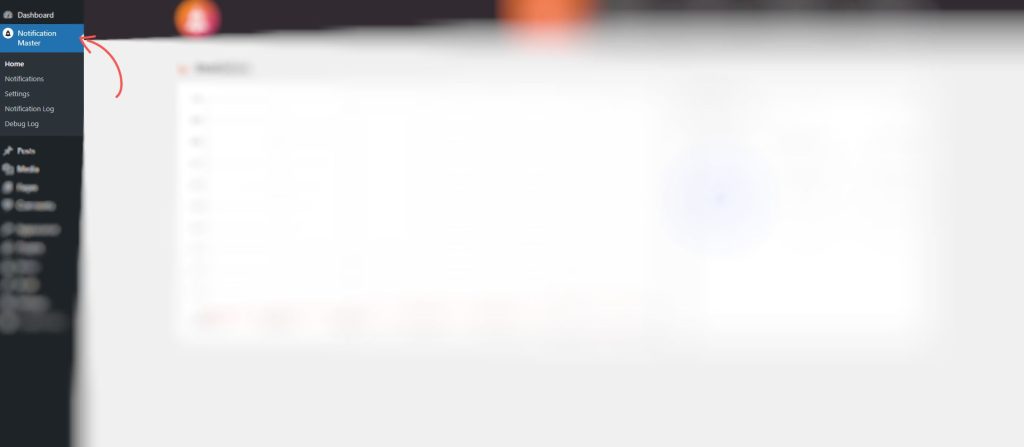
1. Navigate to Notification Master #
Accessing the Plugin Interface:
- From the WordPress main menu, scroll down and click on Notification Master.
- This opens the main interface where you manage all notifications.
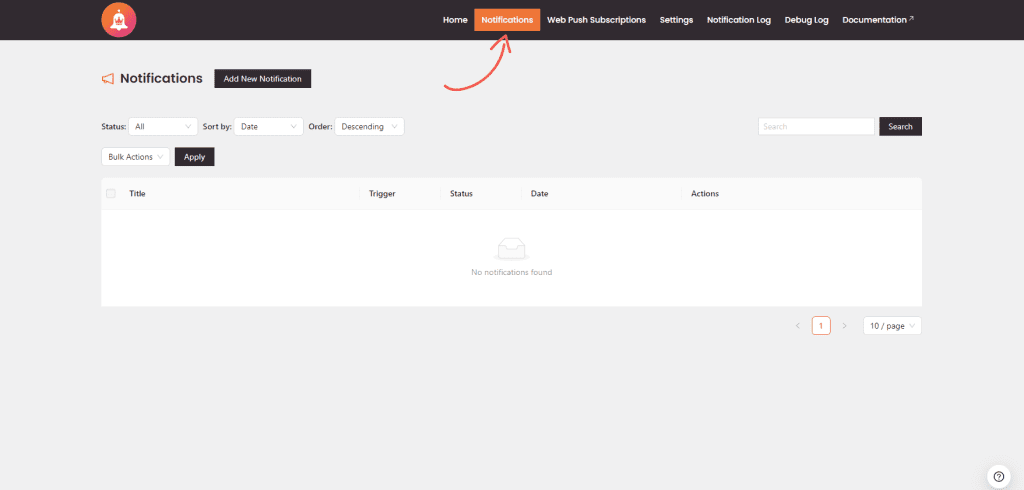
2. Access Notifications #
Managing Your Notifications:
- Click on the Notifications tab within the Notification Master interface.
- Here, you can view, edit, or delete existing notifications.
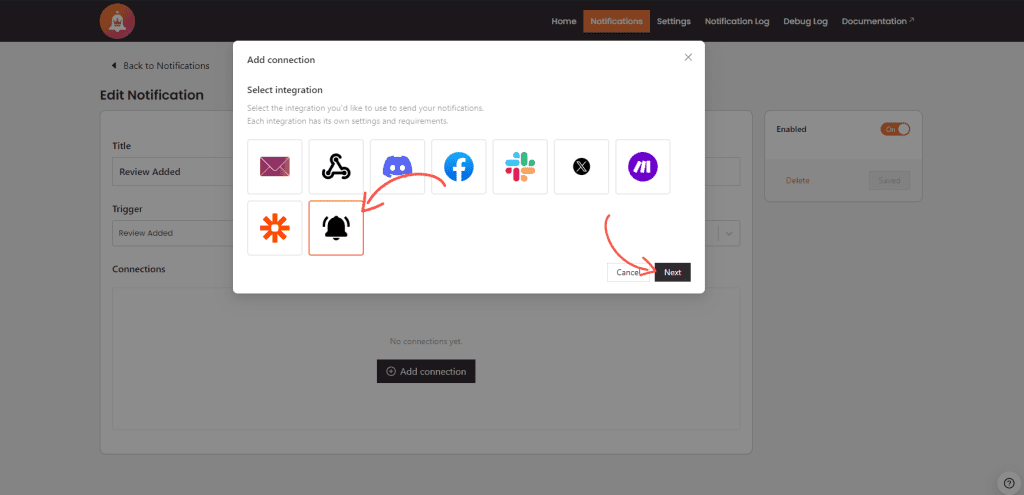
3. Add a Web Push Integration #
Creating a Web Push Connection:
- In the notification configuration settings, scroll down to the Connections section.
- Click on Add Connection to create a new connection for Web Push Notifications.
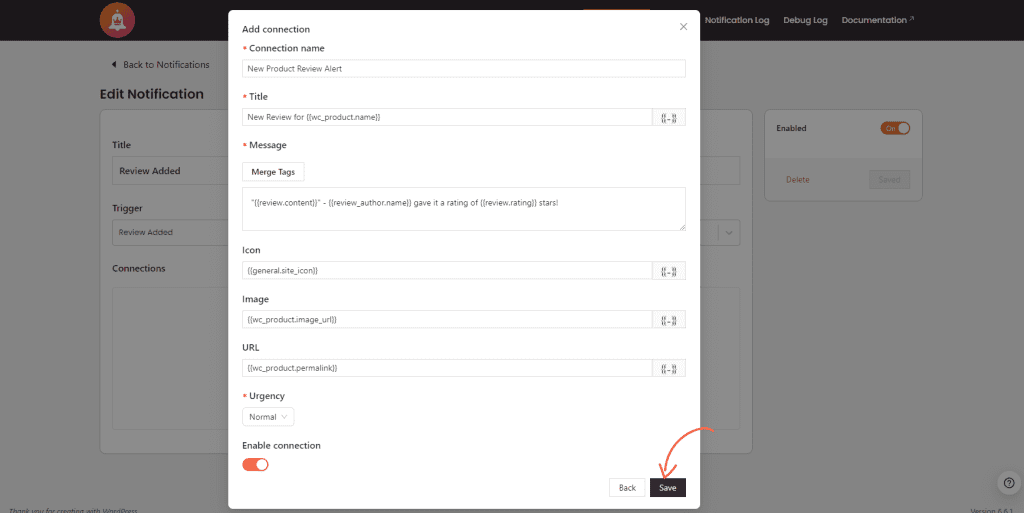
4. Configure the Web Push Integration #
Setting Up Your Web Push Notification:
- Connection Name: Enter a name for your integration to easily identify it later.
- Title: Provide a title for your notification.
- Message: Write the main message you want to display.
- Icon: Add an icon for your notification.
- Image: Attach an image if necessary.
- URL: Specify the URL where users will be directed when they click the notification.
- Urgency: Choose the urgency level (options: very low, low, normal, high).
- Ensure the integration is enabled, then click Save.
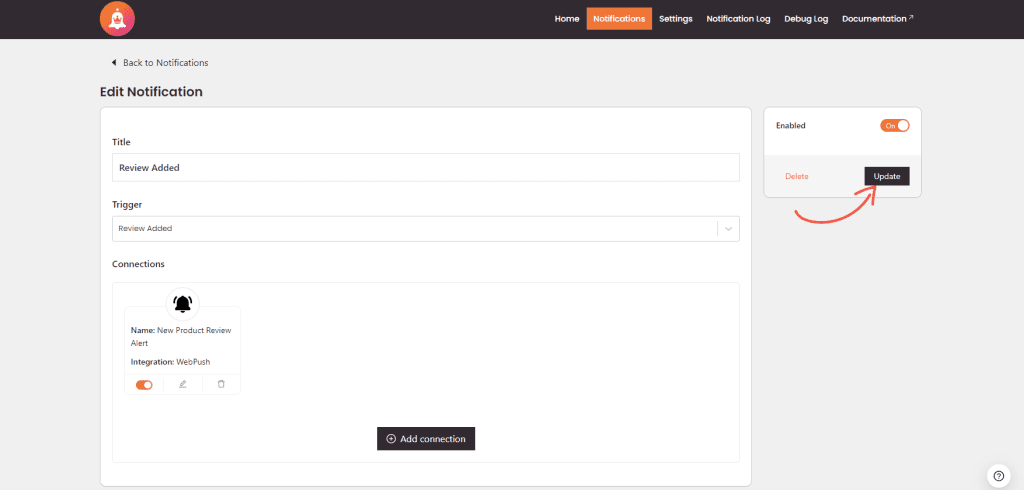
5. Finalize and Save the Notification #
Saving Your Configuration:
- Review all settings to ensure that the Web Push integration and other configurations are correct.
- Toggle the activation switch if necessary to activate the notification.
- Click Save to apply the settings and make your notification live.
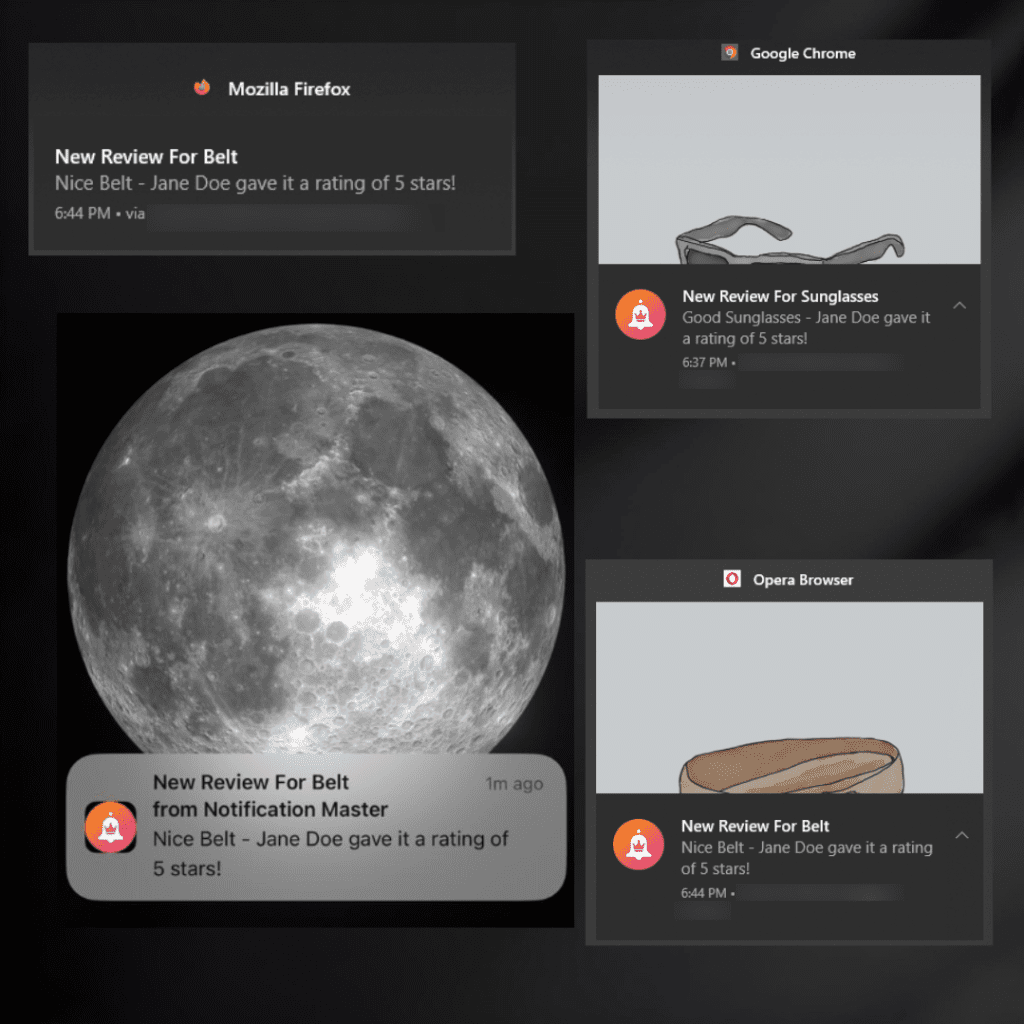
Result After Product Review is Added #
Important Notes #
iPhone Users: For iPhone/iPad users, your site must be added to the Home Screen for the notifications to work.
Conclusion #
By following these steps, you can effectively add and configure Web Push Notifications in the Notification Master plugin. This feature allows you to keep users informed directly through their browsers, enhancing engagement and ensuring timely communication. For more detailed guides, refer to our documentation or contact our support team.


