
Introduction #
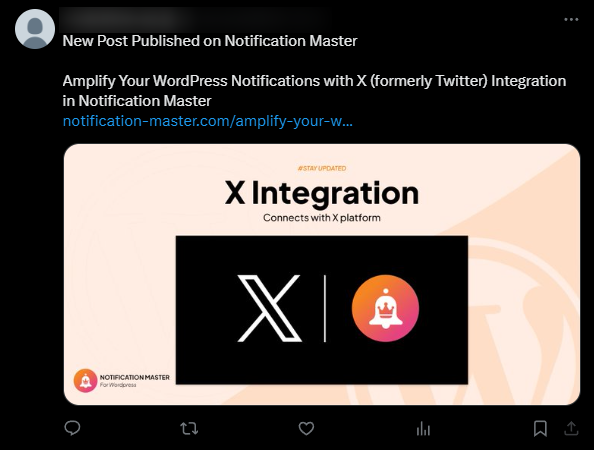
Integrating X (formerly Twitter) with Notification Master plugin allows you to automatically post updates to your X account whenever specific events occur on your WordPress site. This guide will walk you through the steps to set up this integration, enabling you to keep your followers informed and engaged with real-time updates.
How to Set Up and Use the Notification Master Plugin by WP Learning Lab #
Benefits Of Integrating X With Notification Master Plugin #
- Automated Notifications: Automatically post updates to your X account whenever specific events occur on your WordPress site.
- Enhanced Engagement: Keep your followers informed and engaged with real-time updates.
- Dynamic Content: Use merge tags to include dynamic content in your posts, ensuring personalized and relevant notifications.
Setting Up A Developer Account On X #
Create a Developer Account: #
- Go to the X Developer Portal.
- Click on “Setup for Free.”
- Provide a brief description and accept the terms.
- Submit your application.
Create an App: #
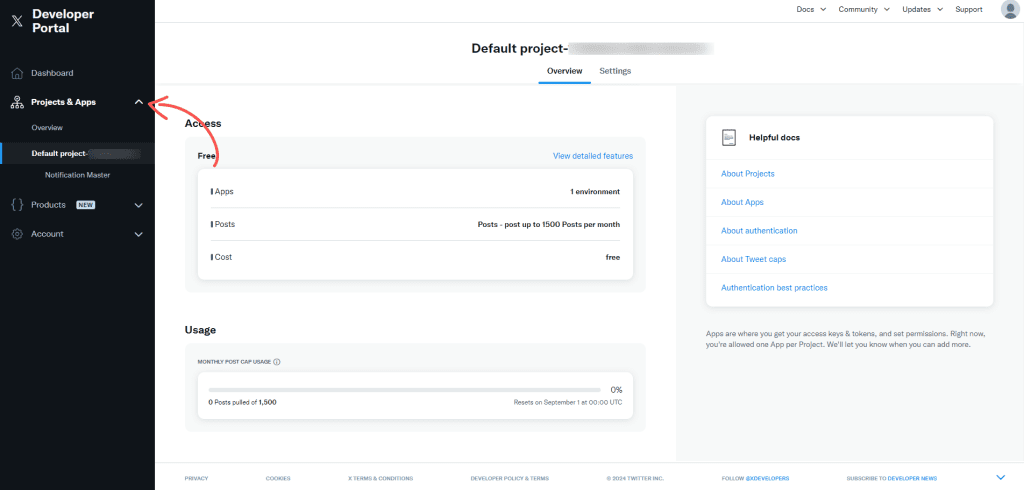
- Navigate to Projects & Apps in the X Developer Portal.
- Your app will be created with your account.
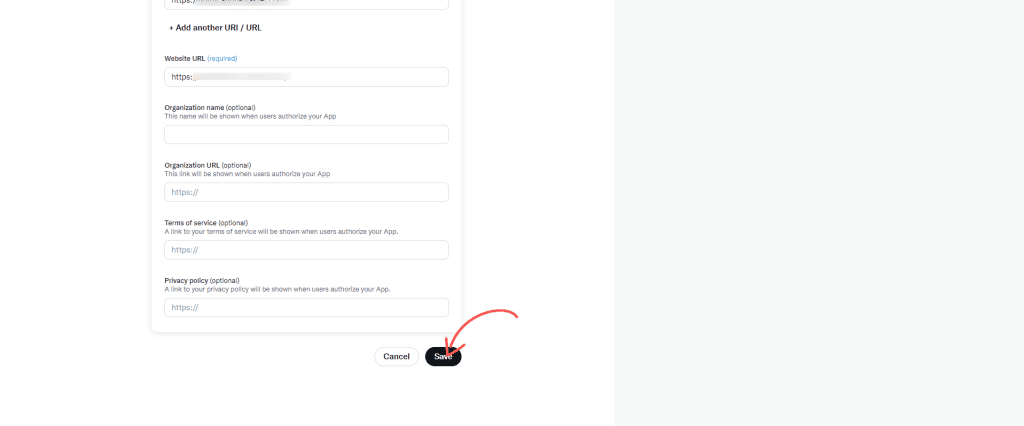
Set Up User Authentication: #
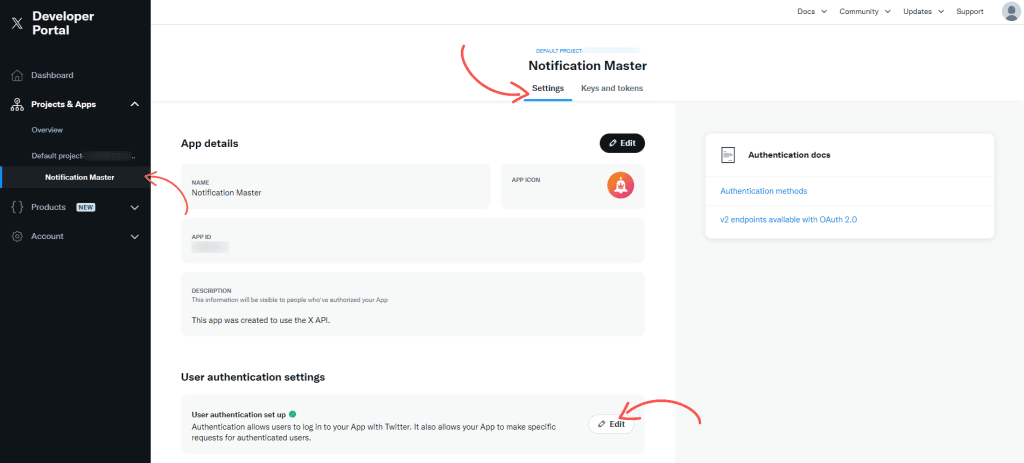
- Click on your default app.
- Go to the Settings tab of your app.
- Scroll to User authentication settings and click Set Up or Edit.
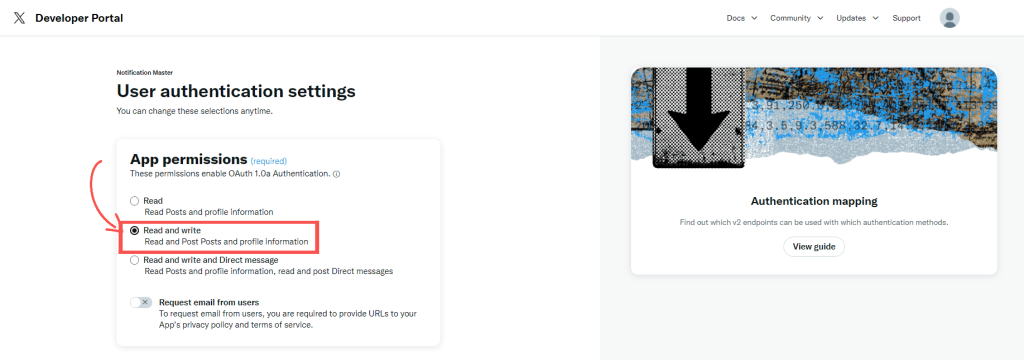
- Choose Read and write under App permissions.
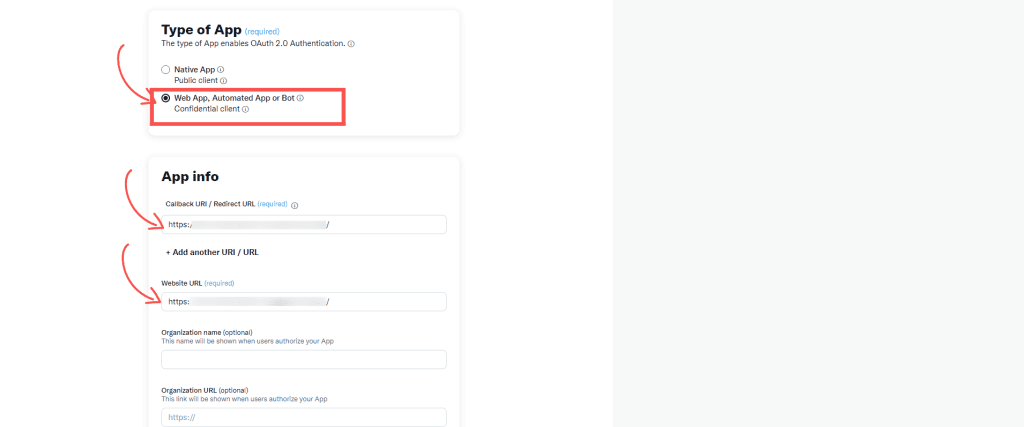
- Select Native App under Type of App.
- Fill in the Callback URI / Redirect URL and Website URL with your site’s URL.
- Click Save.
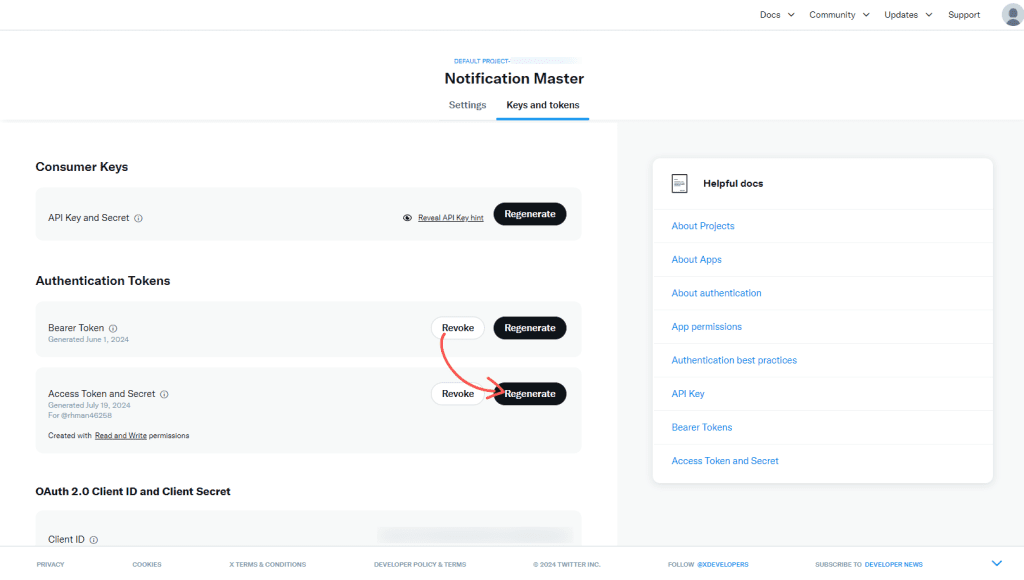
Get API Keys and Access Tokens: #
- In the X Developer Portal, go to your app and click on Keys and Tokens.
- Under Consumer Keys, click Regenerate to get your API Key and API Secret Key. Copy and save them.
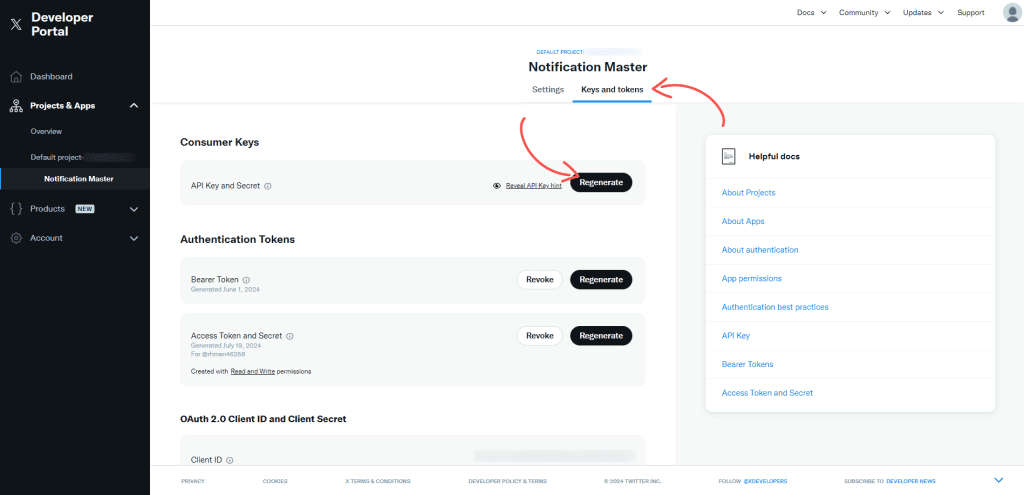
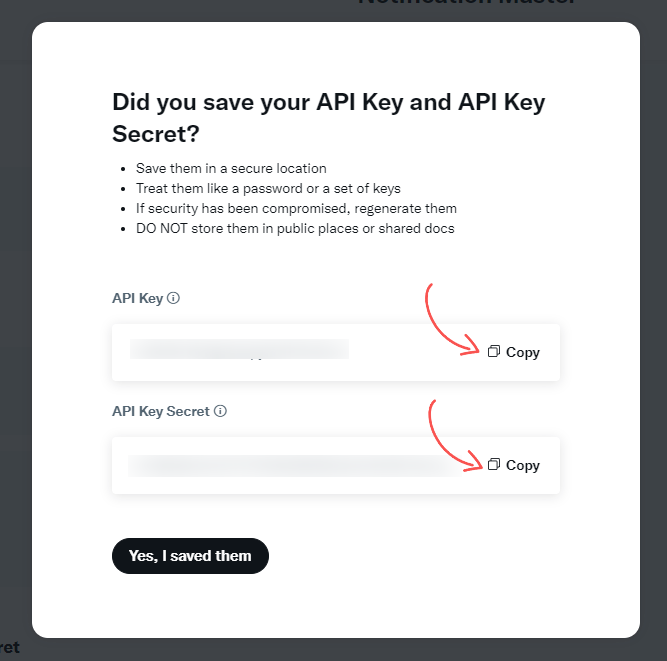
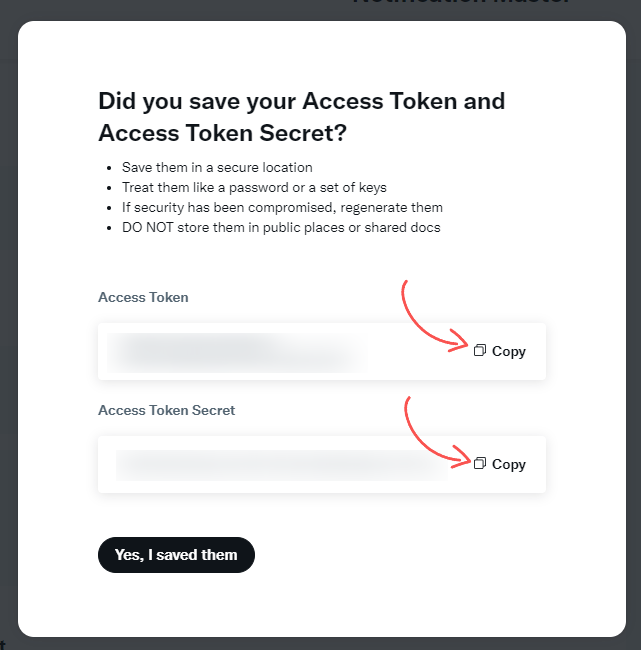
- Under Authentication Tokens, click Generate to get your Access Token and Access Token Secret. Copy and save them.
Configuring X Integration In Notification Master Plugin #
Add X Connection: #
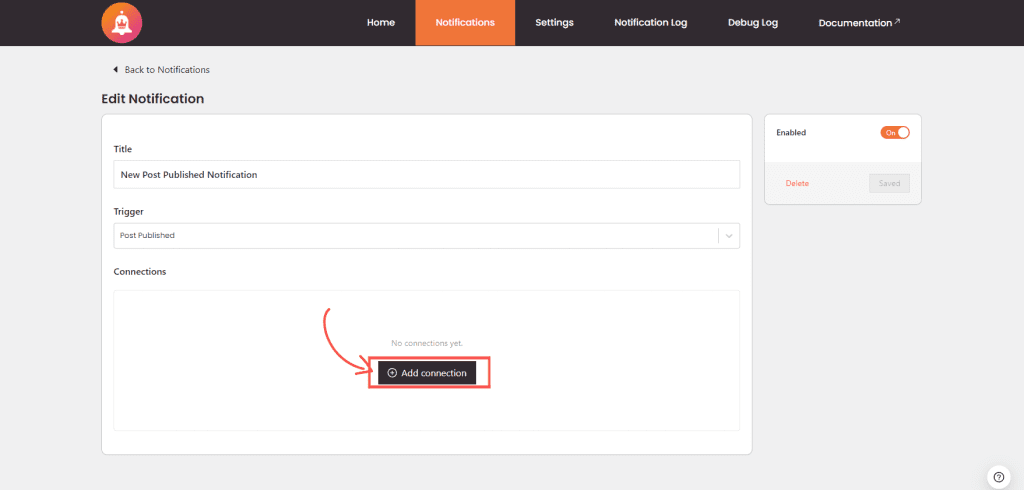
- Go to the Notifications section in Notification Master plugin.
- Select the notification you want to add the X integration to or create a new notification.
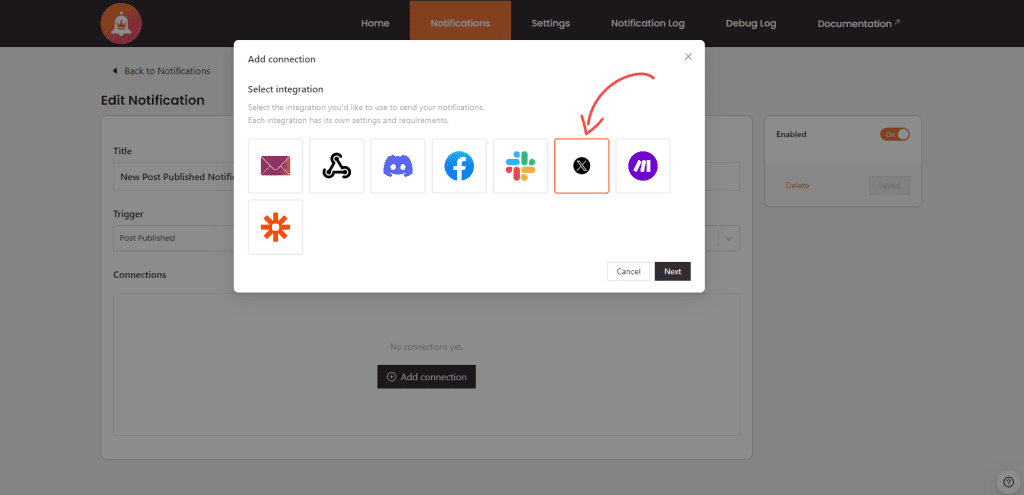
- Click on Add Connection and select X as the integration type.
Enter X API Credentials: #
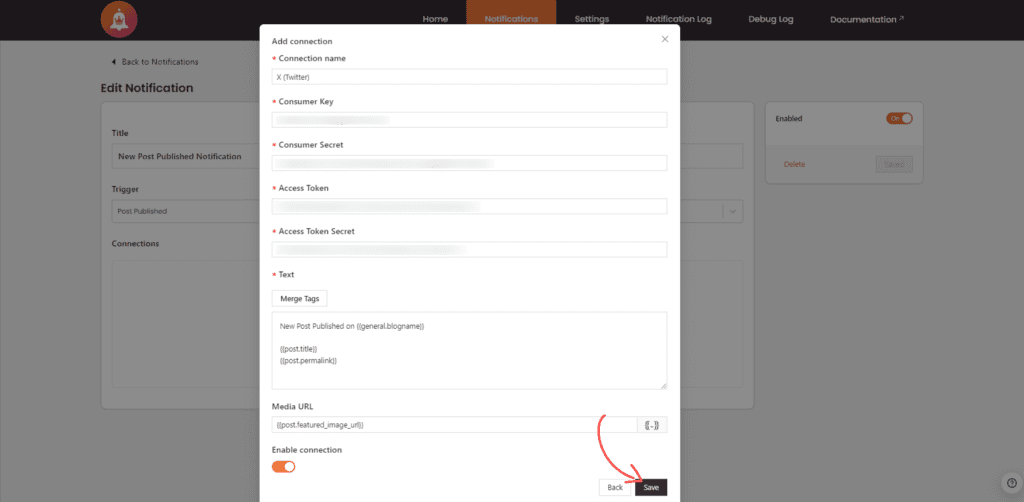
- In the Add Connection modal, enter the following details:
- Connection Name: A name to identify the connection.
- Consumer Key: Your X API Key.
- Consumer Secret: Your X API Secret Key.
- Access Token: Your X Access Token.
- Access Token Secret: Your X Access Token Secret.
Compose the Post: #
- In the Text field, compose the content of your tweet. You can use merge tags to dynamically insert values from your WordPress site.
- Optionally, add a media URL in the Media URL field if you want to include an image or video in your tweet.
Enable and Save the Connection: #
- Toggle the Enable Connection switch to activate the integration.
- Click Save to finalize the settings.
What Happens When a Post is Published #
Conclusion #
By following these steps, you can seamlessly integrate X with Notification Master plugin and automate your notification process. This integration will enhance your site’s communication capabilities and help keep your audience informed via X. Integrating X with Notification Master plugin provides a powerful way to extend your site’s reach and improve communication with your audience.


